Widgets
Table of Contents
Introduction to HomeAdvantage Widgets
Welcome to HomeAdvantage’s suite of powerful widgets! These widgets are designed to seamlessly integrate into your website, providing value to your users by enhancing their experience when exploring real estate options. Below, we introduce you to our key widgets
Home Search Widget
Helps users start a home search directly from your site. Please note, due to MLS compliance, this widget will take visitors to your co-branded HomeAdvantage home search site.
Home Valuation Widget
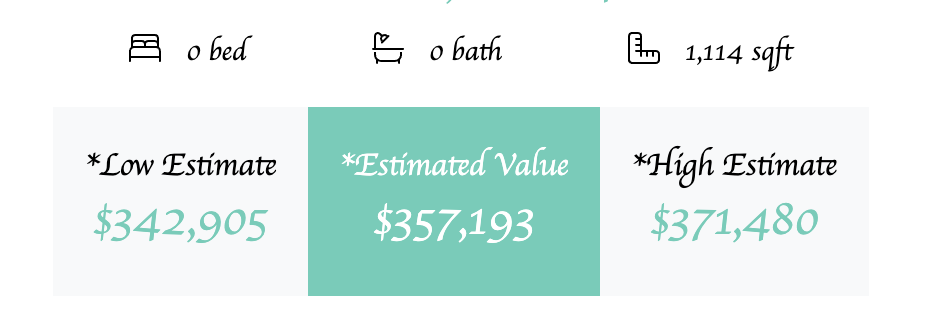
Allows users to get an instant estimate of their home’s value, giving them crucial insight when considering selling or refinancing.
Market Trends Widget
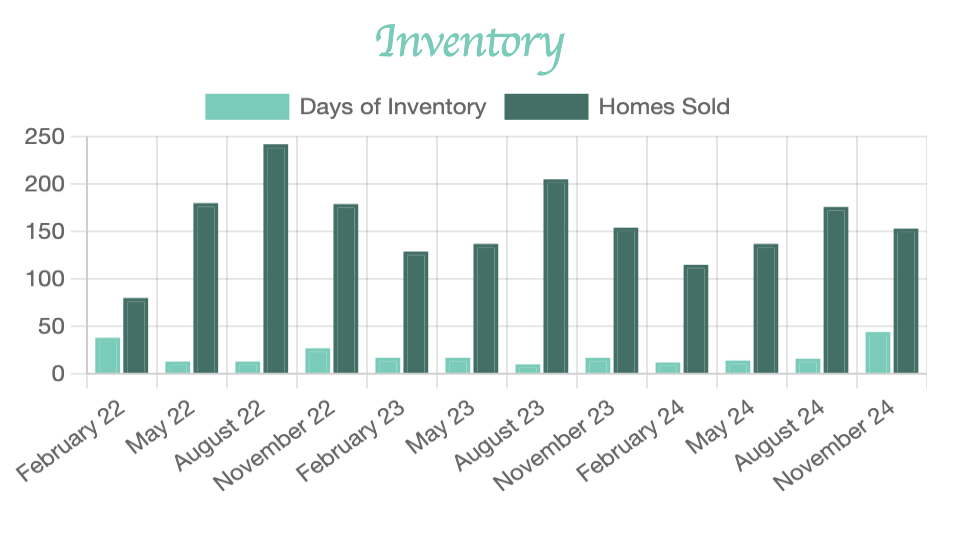
Displays neighborhood-specific market trends, helping users stay informed about what’s happening in their community.
Find an Agent Widget
Connects users with top-tier real estate agents within the HomeAdvantage network, offering them local expertise and a trusted partner for their journey.
Each of these widgets has been crafted to integrate easily into your website, empowering your users with tools to make smarter decisions in their real estate journey.
Step-by-Step Instructions for Header Code Setup
Follow these steps to set up the header code on your website. This process is simple and should only take a few minutes.
IMPORTANT: Before adding any widget to your website, it’s essential to set up the header code. This code acts as the foundation, ensuring the widgets work correctly across all your web pages.
Why is the Header Code Important?
The header code contains key resources necessary for all widgets to function. Without this header code, the widgets cannot access essential libraries or verify your organization’s access credentials. It essentially “tells” your website how to render and run the widgets.
Step 1: Obtain Your Tenant ID and API Key
Your Tenant ID and API Key are unique identifiers that allow your widgets to access data securely. You should have received these credentials from your HomeAdvantage account manager during your onboarding process. If you haven’t received them or need a reminder, please reach out to your HomeAdvantage account manager.
Step 2: Adding the Header Code
Use the following code snippet to set up the widgets. This code should be added to the <head> section of each page where you intend to display a widget.
<script src="https://assets.myhomeadvantage.com/wp/ha-widget.bundle.js" data-tenant="{YOUR_ID}" data-key="{YOUR_KEY}"></script>
{YOUR_ID} with your Tenant ID and {YOUR_KEY} with your API Key. Step 3: Implement the Header Code
For WordPress (Using the Code Snippet Plugin)
- Install and activate the Code Snippet plugin from your WordPress dashboard.
- Create a “New Snippet.”
- Paste the header code into the snippet editor.
- Choose “Header” as the insertion location.
- Save and activate the snippet.
For Regular HTML Websites
- Open the HTML file where you want to add the widgets.
- Place the header code within the
<head>section of your HTML:
Step 4: Verify Your Implementation
After adding the header code, refresh your website and open your browser’s developer console to make sure there are no errors related to the missing Tenant ID or API Key.
Guide: Customize the Widget Attributes
Below we will go into each attribute and what it does. Each one will have samples below it.
Show Overlay (show-overlay):
turns overlay on with yes and off with no.
show-overlay=”yes”
show-overlay=”no”
Overlay BackGround (overlay-background):
Sets the main color of your widget.
overlay-background=”#004261″
overlay-background=”#000000″
Primary Color (primary-color):
Set the primary color of your widget when it expands after the form field is filled out.
primary-color=”#35CCBA”
Secondary Color (secondary-color):
Set the primary color of your widget when it expands after the form field is filled out.
primary-color=”##1D7066″
Overlay Heading: (overlay-heading)
Customize the text to fit your branding.
overlay-heading=“YOUR DREAM HOME AWAITS”
Overlay Sub-Heading: (overlay-sub-heading)
Customize the text to fit your branding.
overlay-sub-heading=“And so do your Cash Rewards”
Text Placeholder: (text-placeholder)
text-placeholder=”Search by City, Zip, Neighborhood…”
Primary Error Text: (secondary-error-text)
Customize the primary text that show when we cannot display results.
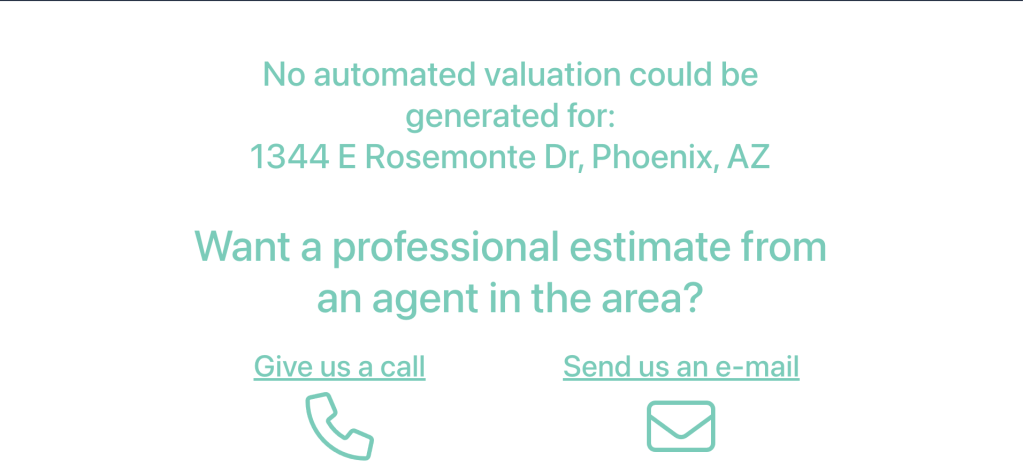
primary-error-text=”No automated valuation could be generated for:”
Secondary Error Text: (primary-error-text)
Customize the primary text that show when we cannot display results.
secondary-error-text=”Want a professional estimate from an agent in the area?”
Error Phone: (error-phone)
Customize the phone number the user calls when presented with a result that cannot be displayed. If no number is added the icon and “Give us a call” will be hidden.
Error Email: (error-email)
Customize the email address the user will email when presented with a result that cannot be displayed. If no number is added the email will default to: service@homeadvantage.com
Font Family: (font-family)
Set a custom font to align with your website style.
Font URL: (font-url)
Set a custom font to align with your website style.
font-url=”https://fonts.googleapis.com/css2?family=Itim&family=Montserrat:ital,wght@0,100..900;1,100..900&family=Playwrite+CU:wght@100&family=Roboto:ital,wght@0,100;0,300;0,400;0,500;0,700;0,900;1,100;1,300;1,400;1,500;1,700;1,900&display=swap”>